About Me

My photo
United Kingdom
Hi there & welcome to Annie's Place. A place inspired by and named after my late Grandmother Annie. Somewhere I can be creative, and share my love for all things handmade. I like nothing better than sitting with hook & yarn, crafting something home spun & completely unique, or rustling up some yummy baked goodies. I live in a town with a beautiful embankment, situated on the River Great Ouse. You may know me as CosyKitty on Ravelry. Why not stop a while.....?!!

Friday, 21 December 2012

Channel your inner Christmas....

Well, that's what Kirstie Allsopp suggests we do! For those that saw Kirstie's Vintage Christmas this past week, you may recollect her saying those four words, and it struck a chord with me. See, I don't think I have channelled my inner Christmas yet?!! 
It's been so chaotic thus far, that I haven't had chance to really soak up the atmosphere properly. I should finally have that opportunity this weekend, when I can take a deep breath and relax into the festivities. I hope to take in a Carol concert or two, that's sure to help. There's nothing quite like hearing a choir sing all the festive classics, to get you into the spirit of things. 

Sadly, there's been little craft action going on round here this week. Although I have been marvelling at the grand efforts made by lots of other lovely bloggers. So many fantastic ideas and inspiration! I have every confidence that there will be plenty of hooky action in the new year though, so watch this space!

If anyone wants me, this is where I'll be for the most part.  
Snuggled up under my Granny Stripe on the sofa! 


I would like to wish each and every one of you

A HAPPY CHRISTMAS 
& A HEALTHY, 
PROSPEROUS NEW YEAR
x x x x x 

Thursday, 13 December 2012

Christmas, Crochet & Crafty bits & bobs


12 days & counting. Really?!!

Don't you think the days are whizzing by far too quickly? I feel like I'm going backwards, not forwards with preparations. Help!!! I suppose the one saving grace is that the tree is dressed and the decorations are up. One thing I truly hate though is sorting the lights out for the tree. I always endeavour to put them away tidily each year, but I swear the elves get to them and tangle them up, just to infuriate me. Ah well, needs must.

Do you like my little santa pegs above?  My sister gave them to me last year and I have to say they came in very handy. A supply of assorted mini pegs is a real must for any crafter.  They can be used in a multitude of ways.  You can pick them up so cheaply in any number of stationary shops on the high street, or online. Plain or coloured, it's best to have a few of both I think....


I decided to string some jute twine across the mantel, 
to peg some decorations along. 

Crafty & Christmassy all at the same time...

I confess I also have a bit of a thing for East of India and Parlane ribbon. I'd happily buy one of each design, but of course that's not remotely possible, so I just settled for one spool of each. I'm using it very sparingly....

Before I go, I've tried my hand at another of Jan Eaton's blocks from her book 200 crochet blocks for blankets, throws & afghans. Certain patterns jump off the page at me, and one I've been meaning to try for a while is the 'Edwardian Fancy' page 77, block no.88. I suppose I'm known for my love of bright colours, but on this occasion I chose to go with a more earthy palette.


I didn't follow the pattern to the letter, as I wanted a more solid border.  So I adapted it slightly.  I really love the wheel effect in the centre.  I think it would look fab in an array of different colours, don't you?


p.s. those of you who are in the UK, how many of you are watching the finals of Masterchef?  Nail biting stuff eh?! I like all 3 of the finalists, but I must say I'd like Keri to win! Girl power an' all that ;) x x  

Sunday, 9 December 2012

DIY Scrapbook Paper Wreath


Hello readers, hope you're enjoying what's left of your weekend?!! Huge thanks to everyone who so kindly commented on my very first attempt at cross stitching post, I haven't stopped grinning since reading your wonderful feedback x x   

I've been busy you know? I thought it high time I put some of the paper I've accumulated over recent years to good use. I'm not a scrap booker, but I have a bit of a penchant for pretty card stock, much in the same way as my obsession for gift wrap, as discussed a few weeks back. 

I sourced a lovely selection from etsy some time ago, which included 12"x12" sheets from Amy Butler, Carolyn Gavin Greenhouse & Fashion District. So I thought I'd try my hand at creating my very own wreath. Granted I didn't plump for festive colours, but I don't necessarily think it matters, as at least this way it can be displayed all year round.

I gathered up my supplies and set straight to it.  

- large plate 
- small bowl 
- pencil
- empty cereal packet
- assorted papers
- mod podge
- small paint brush
- paper cutter
- stapler
- ribbon

all things you may have available to hand, right now?!?!


You can choose whatever papers visually excite you, there's no rule. It's about what makes you happy!! I decided to choose some pinks and greens. It really is very simple to do. This isn't intended as a detailed tutorial, but if anyone's interested I'll just give a very brief outline of how I created this wreath, and if anyone has any questions, feel free to comment and I'll answer as soon as I can.  

Here goes.... 


I just utilised an empty 750g cereal carton to make the wreath form. Draw around a dinner plate with a pencil, cutting out 2 identical circles from the card board box. Then find the centre of each, place a smaller plate, bowl, cup or glass (or anything circular) and draw around that. You can then cut out the smaller circle to create the gap in the middle of the wreath. Then just glue the two together, with whatever medium you have (I used Mod Podge), et voila, you have a very simple yet effective template to work on. Let's face it, you're not going to see it once it's covered in pretty paper, so don't worry about the crudeness of it. After all, I didn't have anything else, so I improvised.  Isn't that the first rule of crafting??!! ;)

I then set to the task of cutting a whole batch of paper strips, measuring 1" x 5" using my paper trimmer. Stapling each one end to end, as I went. Thus creating the little individual ribbons of paper for gluing onto the cardboard template. Now you're ready to get really creative. Just place a little glue on the back of each paper ribbon, at the stapled end and off you go. Stick, stick, stick away to your hearts content.....
Ribbon Detail

Again, there's no uniform way to do this. It's really up to you what shape your wreath takes. You can stick in rows, or just randomly.  It's one of those 'make it up as you go along' projects. You'll probably get into a steady rhythm, once you've stuck the first 10 or so. So trust yourself and you'll be fine.


Once you're nearly all the way round you need to remember to feed your piece of ribbon in through the cardboard template, so that you can hang it. You can then stick the remaining few ribbons of paper on until  completely covered.

To finish off, you may want to paper the reverse of the cardboard template, so that if you hang it on a mirror it will look just as pretty from the back. 

Well, there you have it.  A very simple DIY wreath, that anyone can try.  I decided to hang mine on the front door for all to see. Proud, much...... x x x


Wednesday, 5 December 2012

Colourful Christmas Cross Stitch

Hey there lovely people, it's a wonderfully crisp frosty day here. Waking up to a dusting of snow was really exciting. I love it when there's not a cloud in the sky, and it's the bluest of blues. Makes me want to pile on the layers and venture out to enjoy it. From the inside looking out you could be deceived into thinking it was a warm sunny day! If it wasn't for the starkness of the trees and the obvious icy hue to everything, you could be easily fooled!!

I wanted to share with you the fruits of my latest crafty labour. This time in the form of some festive cross stitch.  It's something I decided to try on a whim. As a young teen I was a big fan of 'Forever Friends', a range of cards and gifts all centred around a cutesy little bear.I soon amassed quite a collection of bits & bobs, from sweet little trinkets to the adorable teddy bears themselves. 

I don't think I ever really grew out of it! So when I happened upon a cross stitch kit from the same brand, I couldn't resist snapping it up. I'd never attempted cross stitch before but was willing to give it go. It took a bit of time to get used to reading the pattern, but once you're into the swing of things, it's really quite easy. Would you like to see how I got on? 

Here's a few detailed shots


and the final result is this......


I decided it should have pride of place on my craft shelf, 
so I bought a simple white frame with a plain 
aperture to display it.


I'm really rather chuffed with my small piece of cross stitch art, 
and would encourage everyone to have a go x x x

Monday, 3 December 2012

Granny Stripe Colour Sequence


Happy Monday everyone! I've had a few enquiries recently about my Granny Stripe Blanket, regarding the order of colours I've used. So I thought it might be useful to post up a list, so that anyone who wants to create something equally as Rainbow-tastic can do so!!

I know what it's like to see somebody else's work and think 'Wow, I'd love to re-create that project!!' and how helpful it is when the crafter generously writes up a comprehensive list of the yarn and colours used.  So here's my offering.....

Hook Size - 3.5mm

Foundation Chain 
:Pomegranate

Two rows each of the following colours
:Pomegranate :Lipstick :Shrimp :Saffron :Sunshine :Spring Green :Meadow :Aspen :Sherbet :Cloud Blue :Aster :Turquoise :Denim :Bluebell :Lavender :Wisteria :Clematis  :Magenta :Plum :Lipstick :Bright Pink :Fiesta :Fondant :Pale Rose 

*:Pomegranate :Shrimp :Sunshine :Saffron :Spring Green :Meadow :Aspen :Turquoise :Sherbet :Cloud Blue :Aster :Denim :Bluebell :Lavender :Wisteria :Clematis :Magenta  :Plum :Lipstick :Bright Pink :Fiesta :Fondant :Pale Rose

:Pomegranate :Shrimp :Saffron :Sunshine :Spring Green :Meadow :Aspen :Sherbet :Cloud Blue :Aster :Turquoise :Denim :Bluebell :Lavender :Wisteria :Clematis  :Magenta :Plum :Lipstick :Bright Pink :Fiesta :Fondant :Pale Rose**

Repeat from *  to ** as many times as you like to achieve the required size blanket
Detail
I'm still striping away, not sure when this particular project will be finished.   I've done 174 rows so far, and at over 6ft wide it's been quite a task.  I'm hoping to add a really nice border to it.  

Hope this inspires a few people?!!!


Happy Hooking x x x 

Saturday, 1 December 2012

A pinch and a punch.....

So, it's the 1st of the month, and I've turned to the final page of my 2012 calendar. It's sure to be a hectic month !! So much to do, so little time.....

I have to say it's been a pretty manic end to November for me, so I thought I'd take five and pop my head in to welcome all my new readers.  How are the festive preparations going your end?  They're pretty much non-existent here at the moment, but I'm sure I'll get into the spirit of things in the coming days.  One thing I'm really looking forward to is decorating the house with colourful sparkly things. I bought plenty of lights last year, so once they're up I'm sure I'll feel all giddy with excitement.


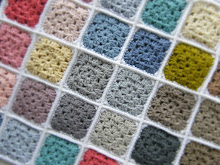
On the hook this week are some little 4 round grannies.  I decided to use Grey as the framing colour this time, what do you think? They're a bit rough round the edges, but they should be fine once blocked, and crocheted together with a simple slip-stitch. 


I'm enjoying the gentle flow of creating piles of these colourful little treble crochet squares.  Not taxing at all, perfect for those moments when you just want to hook away without putting in much effort.

Right, I'm off to do a few more! Wherever you are in the world, I hope you're having a fab weekend.  

See you soon x x x  
  
Related Posts Plugin for WordPress, Blogger...