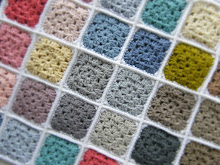
Hello lovely readers, before I jump into today's post I really wanted to thank you all for the wonderful comments on my last post. My rules seemed to resonate with a lot of you, especially number 3.Thou shalt not feel guilty for having too many wips on the go at once.There's no shame, we're all the same! (sorry, been watching way too much embarrassing bodies it seems. Those of you outside the UK probably won't have a clue what I'm talking about and may think I've lost my mind completely, don't worry it's just my silly sense of humour)
It's a common side effect though of being addicted to yarn. It's impossible to solely concentrate on one project at a time, so let us rejoice 'we shall no longer worry about all the ufo's we have languishing at the bottom of our baskets, or hidden away in a drawer or cupboard. We are now liberated! Fear not hooky friends, no more will we allow ourselves to be judged for buying more yarn than is necessary, and flitting between projects. Agreed?
Right, down to today's business. Over the weekend I was doing my usual browsing online, and came across two awe inspiring projects here and here. I was knocked sideways by the gorgeous palettes chosen by both these very talented crocheters. I couldn't find a pattern, but as it looked like a fairly simple concept and with the visuals to guide me, I decided to try my hand at working up one for myself.
I grabbed some yarn, (yes you guessed it) my trusty Catania Cotton and a 3.5mm hook, found a comfy spot on the sofa and proceeded to make my first block. One turned into two, turned into three, four, five. I got quite carried away with it. I was so happy with the results I took the crazy notion that I might try and write up a pattern for it to share.
So without further ado, I hereby present my very first attempt at a Crochet Tutorial. I've decided to call my interpretation the Happy Flower Block. Please bear in mind I'm completely self taught and have limited ability in this area, therefore if there are any mistakes I can only apologise. I've tried to be as detailed as I can, combining written instructions along with a pictorial guide. Please let me know how you get on? It would please me no end to hear you've given it a go, and it worked *fingers crossed* x x x
Just click on the images for a larger, more detailed view.
Please Note:
Rounds 6&7 do not start in a corner space.
I begin the round where the previous finishes.
Also, pictures are as a guide only and do
not always correspond exactly to the
written instructions beside/beneath.
Thank you.
Ok, here goes *deep breath* x
Foundation Ring
Round One
Round Two
Round Three
Round Four
Round Five
Round Six
Round Seven


